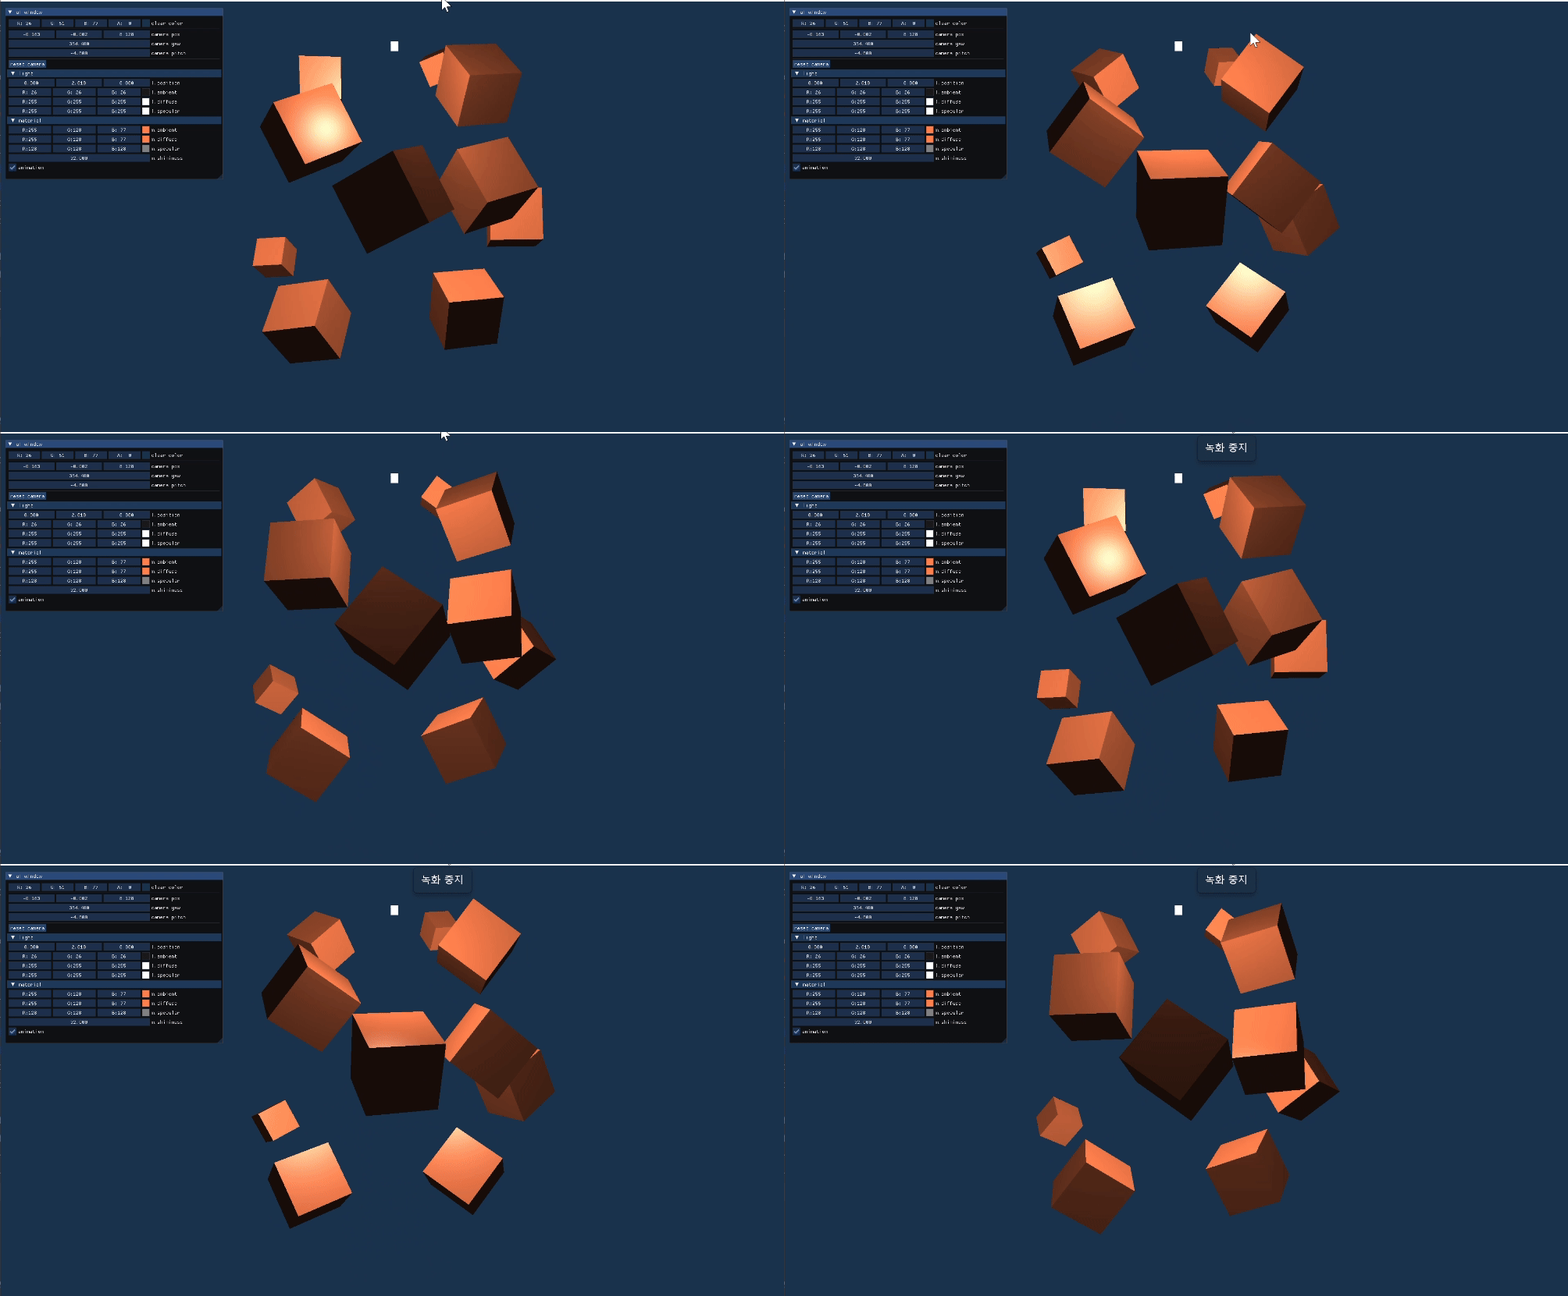
이번에는 Phong 모델을 사용해 조명 처리를 어떻게 적용하는지 다루겠다.
Phong 모델은 물체 표면의 색상을 결정할 때 주변광(ambient), 분산광(diffuse), 반사광(specular) 세 가지 요소를 더해 최종 색상을 계산하는 모델이다. 이 모델은 OpenGL에서 조명 효과를 구현할 때 많이 사용된다.
1. 조명
물체 표면의 색상은 빛의 상호작용으로 결정된다. 이 상호작용을 계산하는 데는 여러 방식이 있는데, 크게 Local Illumination과 Global Illumination으로 나눌 수 있다.
Local Illumination은 물체가 직접적으로 받는 빛만을 고려하고, 반사광을 따로 계산하지 않는다. 반면, Global Illumination은 빛의 반사와 같은 요소까지 모두 고려해 더 사실적인 결과를 낼 수 있지만, 계산 비용이 많이 든다. 이번 포스팅에서 다룰 Phong 모델은 Local Illumination 모델 중 하나로, 물체와 빛의 상호작용을 간단하게 모델링한다.
2. Phong의 Illumination Model
Phong 모델은 물체와 빛의 상호작용을 주변광(ambient), 분산광(diffuse), 반사광(specular) 세 가지로 나누어 계산한다.
주변광 (Ambient Light)
주변광은 빛의 방향과 관계없이 물체가 항상 받는 빛이다. 물체가 어둠 속에 있더라도 완전한 검은색이 아닌 약간의 밝기를 유지할 수 있게 한다. 기본적으로 상수 값으로 처리된다.
분산광 (Diffuse Light)
분산광은 빛이 물체 표면에 부딪혀 모든 방향으로 퍼지는 빛이다. 물체 표면의 법선 벡터와 광원 방향의 각도에 따라 결정된다. 이 빛은 물체가 얼마나 밝게 보이는지를 결정한다.
반사광 (Specular Light)
반사광은 빛이 물체 표면에 부딪힌 후 특정 방향으로 반사되는 빛이다. 시선이 반사광과 일치할 때 가장 강하게 보이며, 반짝이는 효과를 만들어낸다. 카메라의 시선 방향과 반사 방향을 고려해 계산된다.
3. Phong 모델을 적용한 셰이더 코드
Phong 모델을 적용한 셰이더 코드를 살펴보자. Fragment Shader와 Vertex Shader를 통해 조명 효과를 계산했다.
Vertex Shader
Vertex Shader에서는 모델 좌표에서 월드 좌표로 변환하고, 법선 벡터와 좌표를 Fragment Shader로 넘겨준다.
#version 330 core
layout (location = 0) in vec3 aPos;
layout (location = 1) in vec3 aNormal;
layout (location = 2) in vec2 aTexCoord;

uniform mat4 transform;
uniform mat4 modelTransform;

out vec3 normal;
out vec2 texCoord;
out vec3 position;

void main() {
    gl_Position = transform * vec4(aPos, 1.0);
    normal = (transpose(inverse(modelTransform)) * vec4(aNormal, 0.0)).xyz;
    texCoord = aTexCoord;
    position = (modelTransform * vec4(aPos, 1.0)).xyz;
}- gl_Position: 변환된 정점의 위치를 저장해 화면에 그릴 수 있게 한다.
- normal: 법선 벡터를 월드 좌표계로 변환한 후 Fragment Shader에 넘겨준다.
- position: 월드 좌표계에서의 물체 위치를 계산해 넘겨준다.
Fragment Shader
Fragment Shader에서는 ambient, diffuse, specular 세 가지 요소를 계산해 최종 색상을 결정했다.
#version 330 core
in vec3 normal;
in vec2 texCoord;
in vec3 position;
out vec4 fragColor;

uniform vec3 viewPos;

struct Light {
    vec3 position;
    vec3 ambient;
    vec3 diffuse;
    vec3 specular;
};
uniform Light light;

struct Material {
    vec3 ambient;
    vec3 diffuse;
    vec3 specular;
    float shininess;
};
uniform Material material;

void main() {
    // Ambient Light
    vec3 ambient = material.ambient * light.ambient;

    // Diffuse Light
    vec3 lightDir = normalize(light.position - position);
    vec3 pixelNorm = normalize(normal);
    float diff = max(dot(pixelNorm, lightDir), 0.0);
    vec3 diffuse = diff * material.diffuse * light.diffuse;

    // Specular Light
    vec3 viewDir = normalize(viewPos - position);
    vec3 reflectDir = reflect(-lightDir, pixelNorm);
    float spec = pow(max(dot(viewDir, reflectDir), 0.0), material.shininess);
    vec3 specular = spec * material.specular * light.specular;

    // Final color
    vec3 result = ambient + diffuse + specular;
    fragColor = vec4(result, 1.0);
}
여기서 각 광원의 역할을 계산한 후, 그 결과를 더해 최종 색상을 결정하게 된다.
- ambient는 물체가 기본적으로 받는 주변광이다.
- diffuse는 법선 벡터와 광원 벡터의 각도를 고려해 물체 표면이 얼마나 빛을 받는지 결정한다.
- specular는 시선 방향과 반사광의 방향을 고려해 반짝이는 효과를 만든다.
4. UI와 연동
ImGui를 사용해 조명 및 물체의 재질 속성을 실시간으로 변경할 수 있는 UI를 구현했다. UI에서 값을 조정하면 실시간으로 조명 효과가 반영된다.
void Context::Render() {
    if (ImGui::Begin("ui window")) {
        ImGui::ColorEdit4("clear color", glm::value_ptr(m_clearColor));
        ImGui::Separator();
        ImGui::DragFloat3("camera pos", glm::value_ptr(m_cameraPos), 0.01f);
        ImGui::DragFloat("camera yaw", &m_cameraYaw, 0.5f);
        ImGui::DragFloat("camera pitch", &m_cameraPitch, 0.5f, -89.0f, 89.0f);
        ImGui::Separator();
        ImGui::CollapsingHeader("light", ImGuiTreeNodeFlags_DefaultOpen);
        ImGui::DragFloat3("l.position", glm::value_ptr(m_light.position), 0.01f);
        ImGui::ColorEdit3("l.ambient", glm::value_ptr(m_light.ambient));
        ImGui::ColorEdit3("l.diffuse", glm::value_ptr(m_light.diffuse));
        ImGui::ColorEdit3("l.specular", glm::value_ptr(m_light.specular));

        ImGui::CollapsingHeader("material", ImGuiTreeNodeFlags_DefaultOpen);
        ImGui::ColorEdit3("m.ambient", glm::value_ptr(m_material.ambient));
        ImGui::ColorEdit3("m.diffuse", glm::value_ptr(m_material.diffuse));
        ImGui::ColorEdit3("m.specular", glm::value_ptr(m_material.specular));
        ImGui::DragFloat("m.shininess", &m_material.shininess, 1.0f, 1.0f, 256.0f);
    }
    ImGui::End();
}
5. 결과

'Computer Graphics > OpenGL' 카테고리의 다른 글
| OpenGL 정리 - 16. Light Casters (0) | 2024.09.23 |
|---|---|
| OpenGL 정리 - 15. Texture Map 적용 (0) | 2024.09.23 |
| OpenGL 정리 - 13. IMGUI (2) | 2024.09.19 |
| OpenGL 정리 - 12. 카메라, View Transform (0) | 2024.09.19 |
| OpenGL 정리 - 11. 큐브 그리기, Depth Buffer, 여러 큐브 그리기 (0) | 2024.09.13 |